MCUXPresso Usage

Hi everyone,
I would like to give you some information about using MCUXpresso IDE that builded from NXP. This chapter includes about how to Import projects to our workspaces, how to builds them, and how to debug and build your projects in workspaces. I will use LPC1113 and LPC1768 MCU series in my works.
Firstly, you need to install MCUXpresso IDE from their official websites.
Import Library
I will explain how to include a library into our workspace in our projects. If you use to LPC series you need to install CMSIS Library to your workspaces. Easily you can download this libraries from my github page for LPC11xx , LPC17xx
After installed these libraries we can open MCUXpresso IDE and go to Project Explorer in workspace and right click then you see Import section. Below image you can see detail.
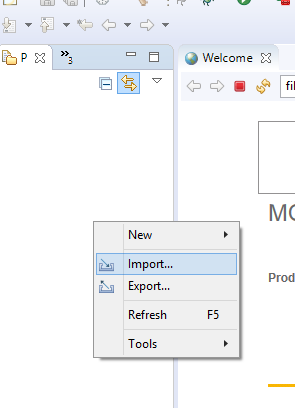
After clicked Import section then you will see under General section Existing Projects into Workspace.

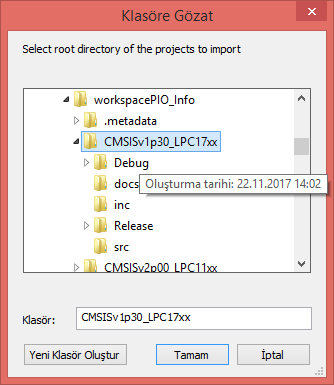
After Existing Projects into Workspace section we can click Browse button then demonstrate our library paths.

Go to your library project files path and select it.
If you successfully select your library path then you will show imported projects files in Import pages. If more than one projects exist in your path you can select which you want. Then click Finish button.

After added projects to your workspaces then you will see added projects like below images in Project Explorer.

Import Project steps finished. You can build added projects. Right click on project files and click Build Project. If you don’t have any error in console, build projects has done.

Create Project
This section you will demonstrate how to create new C/C++ project in MCUXpresso IDE for LPC11xx and LPC1768.
Firstly, we need to import CMSIS Library our workspaces. After that we can create new LPC C/C++ embedded projects.
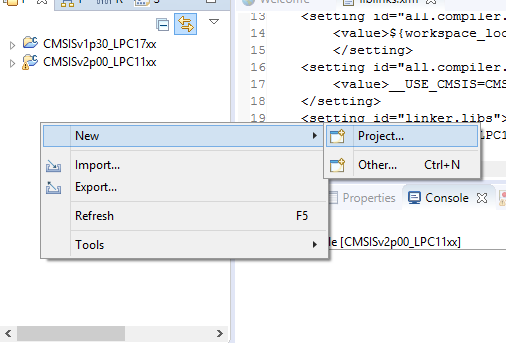
In Project Explorer section right click and select New and New C/C++ Project

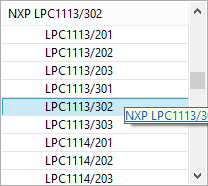
Then select which MCU Type you have. I have LPC1113/302 and LPC1768.
Select which language develop your project opened panel. If you select LPCOpen projects before you need to download LPCOpen libraries. I will use CMSIS Library so select C project. Then click Next button.
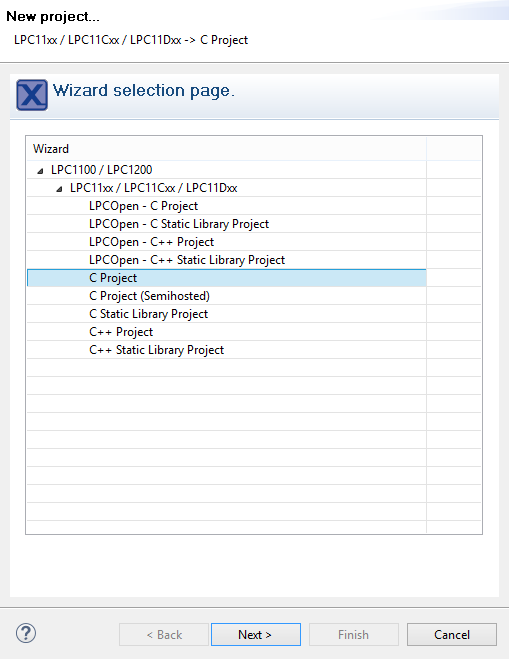
Type your project name in Project name: label then click Next button.

This section is important. You will see Wizard properties page and select which library you want to use in CMSIS Core library. You need to be careful when select core library because you have already imported your library in workspace before. I have already imported CMSISv2p00_LPC11xx and CMSISv1p30_LPC17xx these libraries into my workspace.
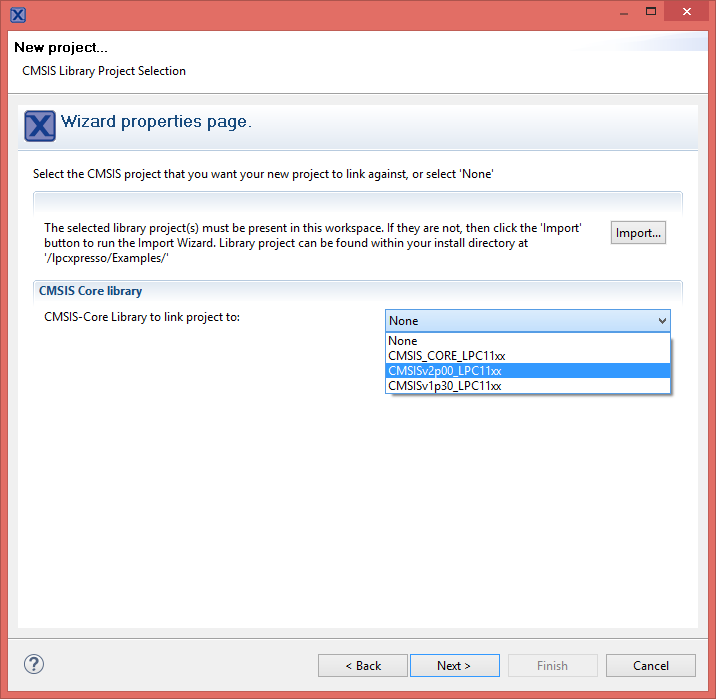
After select core library click Next and you can simply see your project into your workspace.

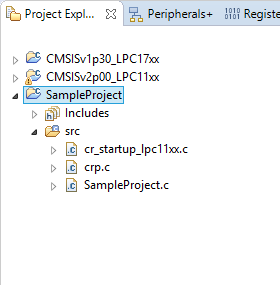
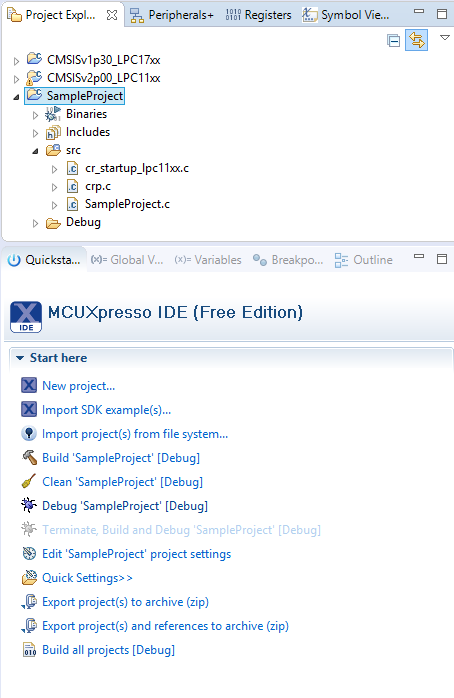
Simply you can see your project that in Project Explorer.
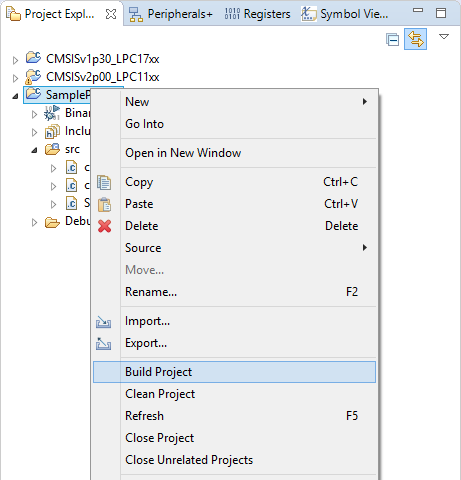
After all that time you can build your project, shown below images.
These steps finished and your simple project has ready for development with in CMSIS library.
Add External Library
Most of our development times we create external or internal library for our purpose usage. Some libraries must be generic and use where you want. So we need to add these libraies our main projects. This section demonstrate you how to import external library to your project.
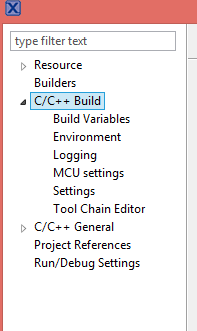
Firstly, right click on your project and go to Properties than go to Settings label under C/C++ Build section.
Properties | C/C++ Build

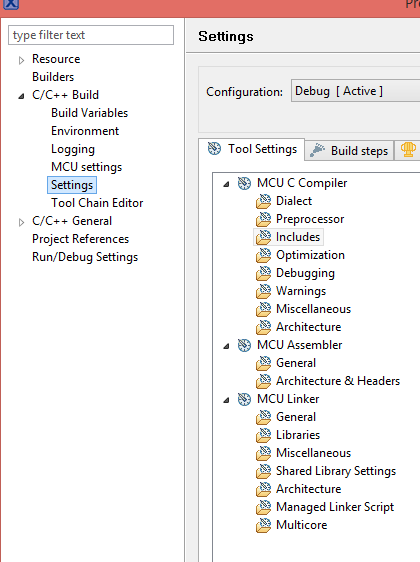
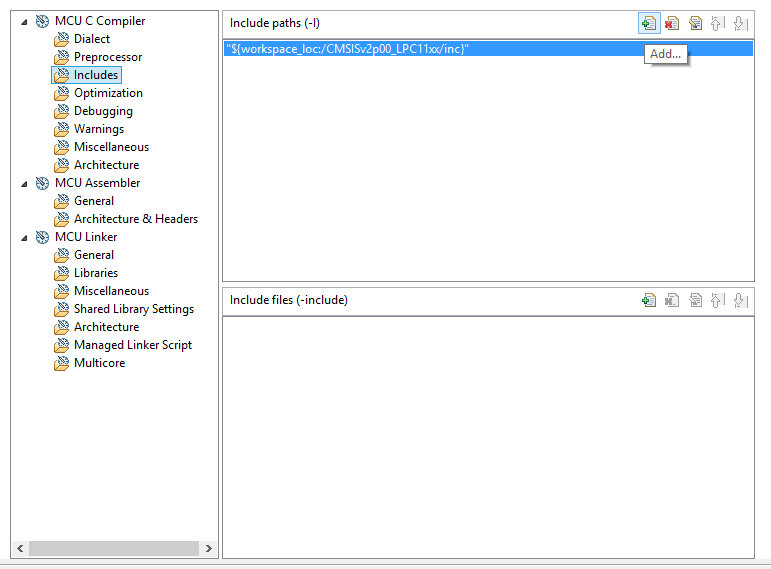
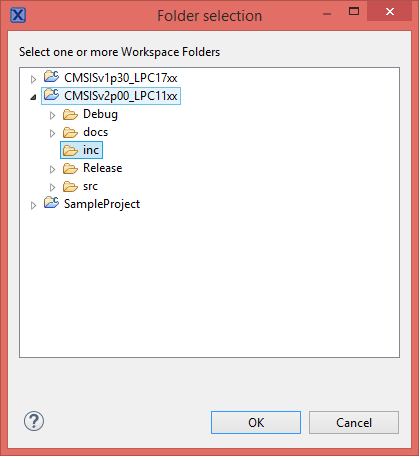
After selected Settings label than select Includes under Tool Settings than add your library path in Include paths (-l) label with Add button. You can simply see how to add library paths as below images.

After all that you can Build your project and see has any error or other things you need.
Debug Project
Development time all developers need to Debug so this section demonstrate how to debug MCUXpresso project.
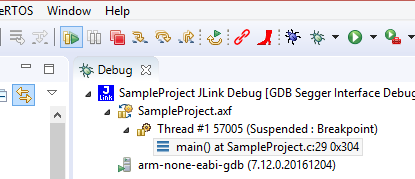
In order to debug the created project we select our project in Project Explorer and then click on the Debug tab in the Quick Start panel and then wait for Jlink to run.
The first time we run the JLink screen will continue to select the future and we are ready to use the screen by clicking on Accept button.
In order to be able to install the program, the energy of the cycle should be given your device circuit.

If Debug succeeds, the main function will also fall to breakpoint. Then you can run the project by pressing the Resume All Debug button at the bottom.
I hope you enjoy reading.
Have a nice coding…